Setup os-ddclient for when external IP address changes
Here's a step-by-step guide in English on how to configure os-ddclient in OPNsense to automatically update your Cloudflare DNS records when your external IP address changes (e.g., from your ISP).
If you get the concept of this then you should be able to do this for DuckDNS or Dynu DNS or one of the other options in a similar way.
Prerequisites
Before you begin:
-
You need a Cloudflare account.
-
You need a domain managed by Cloudflare.
-
You should have your Cloudflare API token or API key (Token is preferred for security).
-
os-ddclientmust be installed and enabled in OPNsense (System > Firmware > Plugins> installos-ddclient).
Step-by-step Configuration
1. Enable os-ddclient
Go to:
-
Services > Dynamic DNS > Settings -
Check Enable
-
Click Save
2. Add a Dynamic DNS Account
Go to:
-
Services > Dynamic DNS > Accounts -
Click ➕ Add
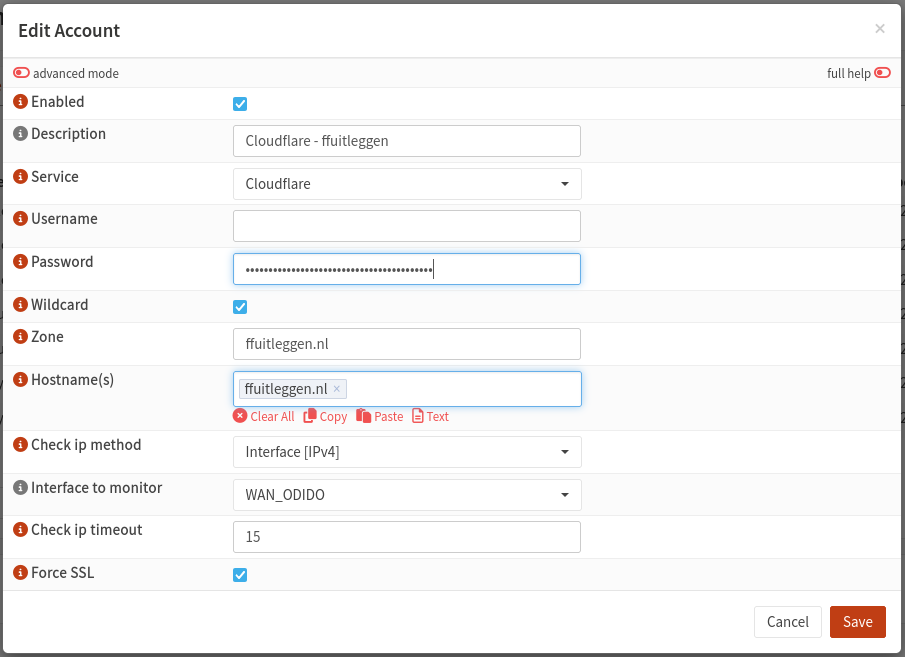
Now fill in the required fields:
General Settings
-
Enabled: ✅
-
Description: e.g.,
Cloudflare mydomain.com -
Service:
cloudflare
Cloudflare API Credentials
You have two options: API Token (preferred) or Global API Key.
If you're using an API Token:
-
Username: leave blank >>there are problem reported when this is filled in and you are using the API key method.
-
Password: paste your API Token
-
Make sure your API token has permission to:
-
Zone: DNS → Edit
-
Zone: Zone → Read
-
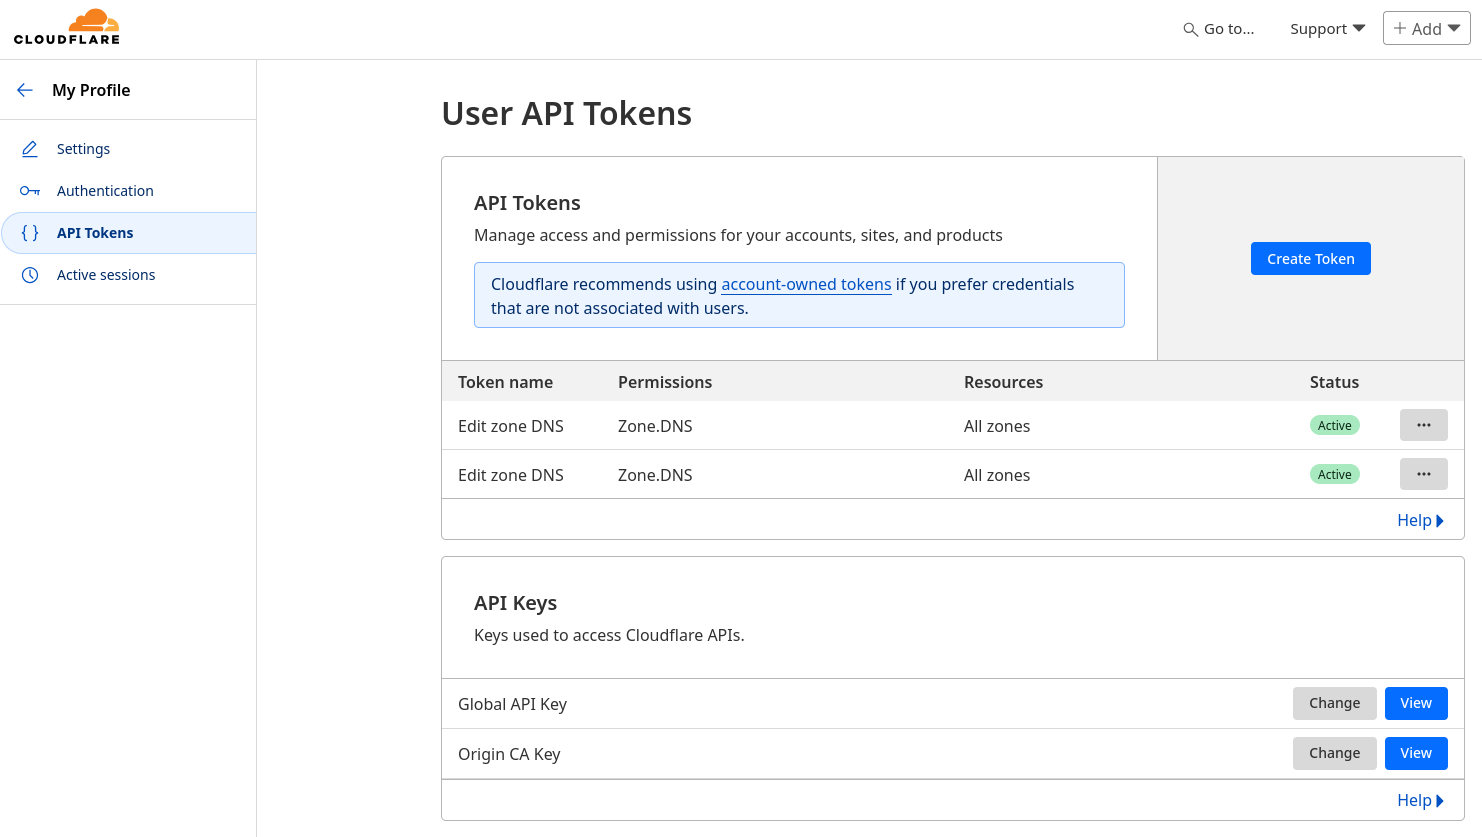
I have made a new API token. When logged in on Cloudflare, go to the top right and click on Profile . Then go to {} API Tokens and add a new token for "Edit zone DNS". Save the token on a safe place.
If you're using a Global API Key:
-
Username / Email: your Cloudflare account email
-
Password: your Global API Key
The use of the Global API key for this is not recommended!
Hostname Details
- Wildcard: usually unchecked unless you want
*.home.example.comupdated too - Zone: your domain name (e.g.,
example.com) -
Hostname(s): the DNS record(s) you want to update (e.g.,
home.example.com) >>when the same API key is used then you can add multiple domain names here.
IP Settings
-
Check IP Method:
Interface(or useWebfor online IP detection) -
Interface to monitor:
WAN - Check ip timeout:
10>> default value in minutes. Leave it as it is. -
Force SSL: ✅ (recommended)
Click Save, then Apply.
Test the Setup
-
After saving, go to the
Services > Dynamic DNS > Log File. -
Click Run now next to your entry to test it.
-
Check the log to see if the IP update succeeded.
Done!
Your OPNsense box will now monitor your WAN IP and automatically update your Cloudflare DNS A or AAAA record whenever your public IP changes.
Geen reacties