Setup os-ddclient for when external IP address changes
Here's a step-by-step guide in English on how to configure os-ddclient in OPNsense to automatically update your Cloudflare DNS records when your external IP address changes (e.g., from your ISP).
Prerequisites
Before you begin:
-
You need a Cloudflare account.
-
You need a domain managed by Cloudflare.
-
You should have your Cloudflare API token or API key (Token is preferred for security).
-
os-ddclientmust be installed and enabled in OPNsense (System > Firmware > Plugins> installos-ddclient).
Step-by-step Configuration
1. Enable os-ddclient
Go to:
-
Services > Dynamic DNS > Settings -
Check Enable
-
Click Save
2. Add a Dynamic DNS Account
Go to:
-
Services > Dynamic DNS > Accounts -
Click ➕ Add
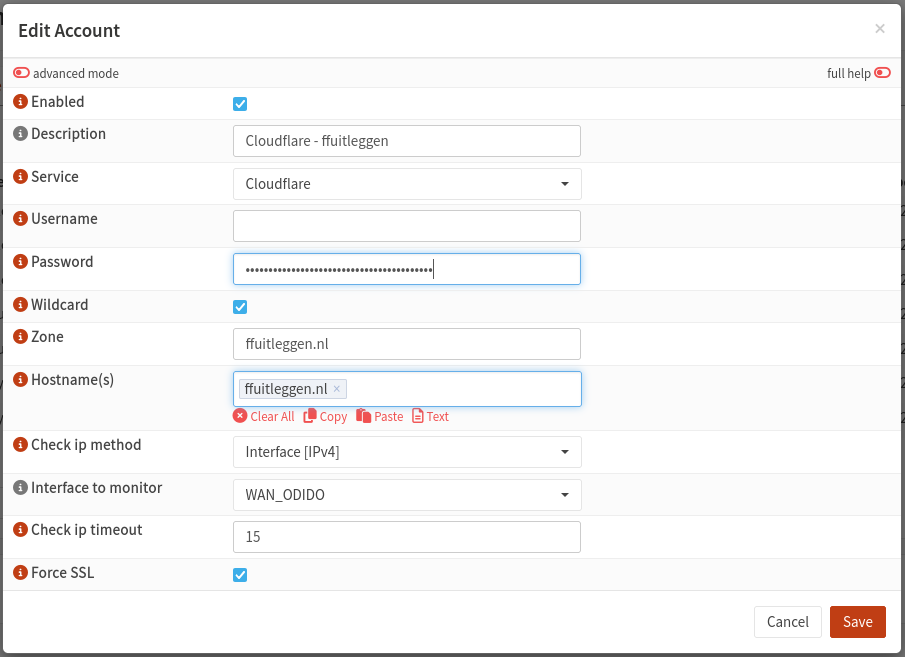
Now fill in the required fields:
General Settings
-
Enabled: ✅
-
Description: e.g.,
Cloudflare mydomain.com -
Service:
cloudflare -
Protocol:
namecheap(even though it's Cloudflare, this is used internally for IP updates)
Cloudflare API Credentials
You have two options: API Token (preferred) or Global API Key.
If you're using an API Token:
-
Username / Email: leave blank
-
Password: paste your API Token
-
Make sure your API token has permission to:
-
Zone: DNS → Edit
-
Zone: Zone → Read
-
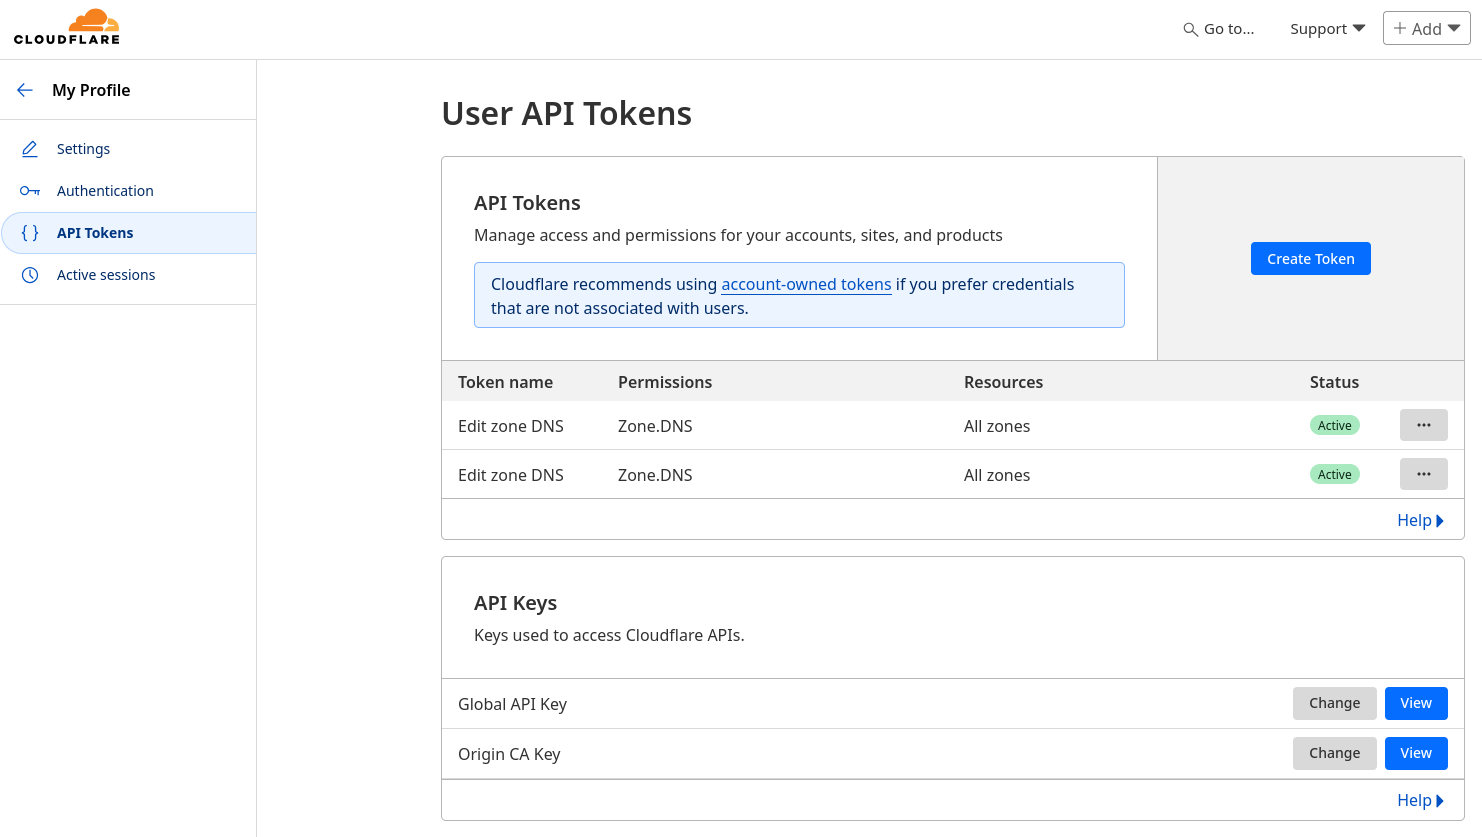
I Made a new API token. When logged in on Cloudflare, go to the top right and click on Profile . Then go to {} API Tokens and add a new token for "Edit zone DNS". Save the token on a safe place.
If you're using a Global API Key:
-
Username / Email: your Cloudflare account email
-
Password: your Global API Key
The use of the Global API key for this is not recommended!
Hostname Details
-
Zone: your domain name (e.g.,
example.com) -
Hostname: the DNS record you want to update (e.g.,
home.example.com) -
Wildcard: usually unchecked unless you want
*.home.example.comupdated too -
MX: leave empty (unless you're setting an MX record)
-
Back MX: leave empty
-
Offline: leave unchecked
IP Settings
-
Check IP Method:
Interface(or useWebfor online IP detection) -
Interface to monitor:
WAN -
Force SSL: (recommended)
Click Save, then Apply.
Test the Setup
-
After saving, go to the
Services > Dynamic DNS > Log File. -
Click Run now next to your entry to test it.
-
Check the log to see if the IP update succeeded.
Done!
Your OPNsense box will now monitor your WAN IP and automatically update your Cloudflare DNS A or AAAA record whenever your public IP changes.